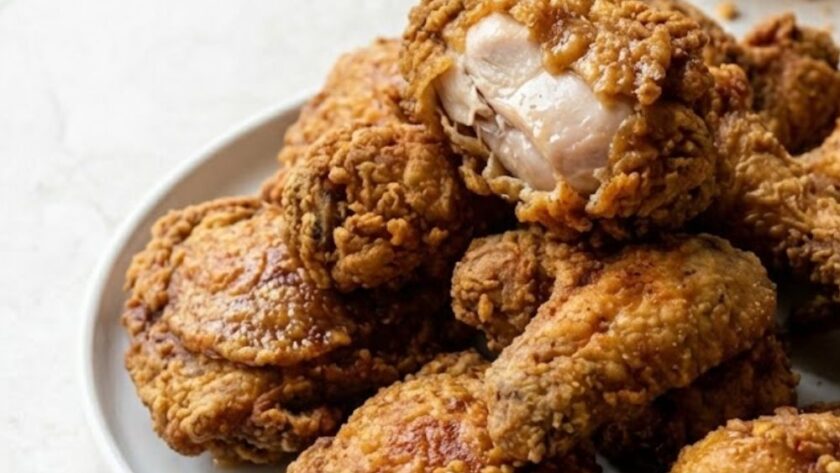
This crispy, tender Alton Brown Fried Chicken is made with a tangy buttermilk brine, a heavy hand of spices, and ready in about 25 hours (including the overnight soak). Watching the golden-brown crust emerge from the sizzling shortening is one of the most rewarding moments in Southern cooking. I used to rush the process, but following Alton’s strict resting and temperature rules finally gave me that perfect, shatter-crunchy coating.
Why This Classic Works
The secret to this recipe isn’t just the ingredients; it’s the specific order of operations. Unlike many recipes that mix spices into the flour, Alton Brown’s method often involves seasoning the meat directly after the buttermilk soak. I found this prevents the spices from burning in the hot fat and ensures the flavor actually penetrates the chicken, rather than just sitting on the crust.
Another game-changer I learned is the drying step. Placing the dredged chicken on a rack to dry before frying allows the gluten to hydrate and the coating to become tacky. When I rushed this step in the past, the breading would slide right off in the pan, but letting it sit creates a bond that withstands the hot shortening perfectly.
Alton Brown Fried Chicken Ingredients
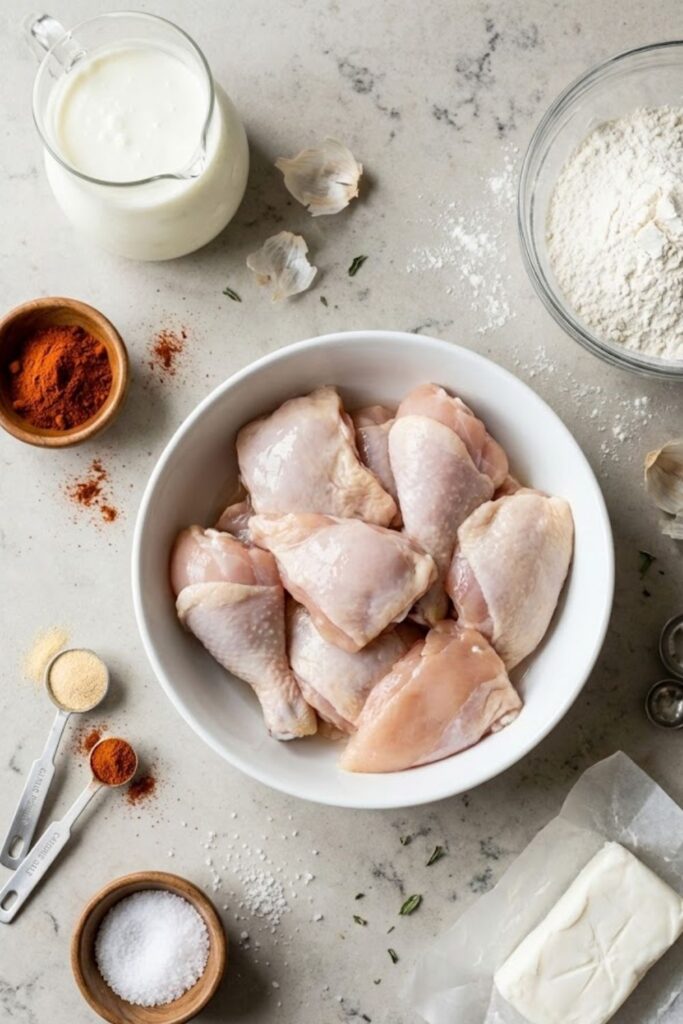
- 1 whole chicken (3-4 lbs): Cut into 8 pieces (2 breasts, 2 thighs, 2 legs, 2 wings).
- 2 cups buttermilk: Full fat or low fat works, but it must be real buttermilk.
- 2 tablespoons kosher salt: Divided for the brine and seasoning.
- 2 tablespoons Hungarian paprika: Provides that signature deep color and smoky flavor.
- 2 teaspoons garlic powder: For savory depth.
- 1 teaspoon cayenne pepper: Adds a subtle background heat without being too spicy.
- 2 cups all-purpose flour: The base for the crust.
- Vegetable shortening: Enough to fill your skillet 1/3 inch deep (about 1-2 cups melted).
How To Make Alton Brown Fried Chicken
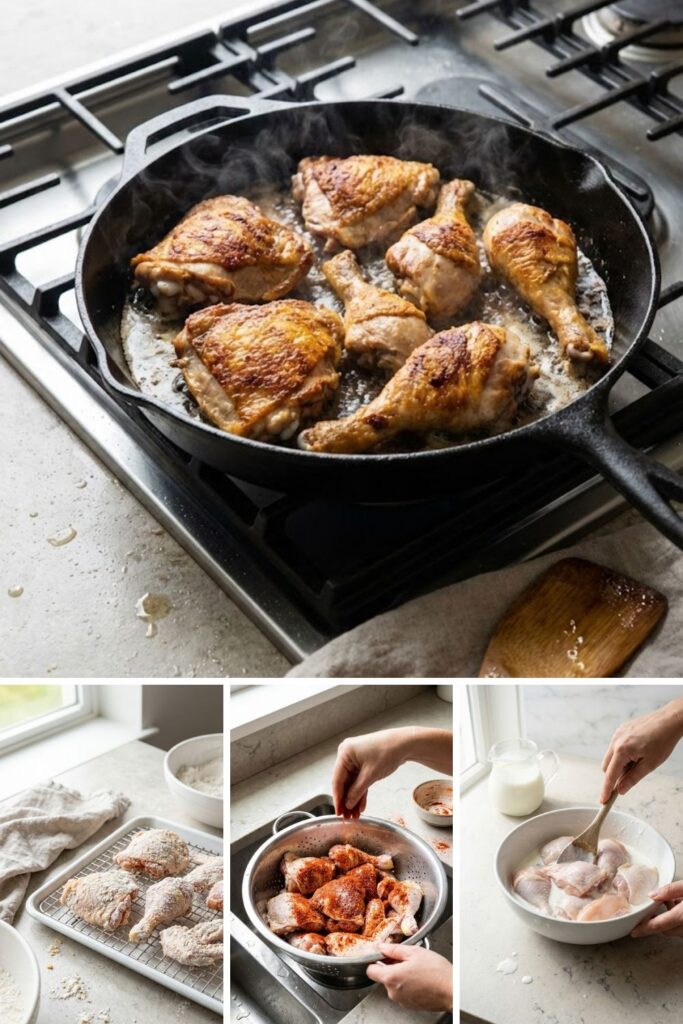
- Brine the Chicken: Place the chicken pieces in a large container or zip-top bag. Pour the buttermilk over the chicken and stir to coat. Cover and refrigerate for 12 to 24 hours. Do not skip this; the acid tenderizes the meat significantly.
- Drain and Season: Drain the chicken in a colander and let it drip dry for a few minutes. In a small bowl, combine the salt, paprika, garlic powder, and cayenne. Sprinkle this spice mixture liberally over every piece of damp chicken.
- Dredge the Chicken: Place the flour in a large shallow bowl or a paper bag. One by one, toss the seasoned chicken pieces in the flour to coat thoroughly. Shake off any excess flour vigorously.
- Rest the Meat: Place the coated chicken on a wire rack set over a baking sheet. Let it sit at room temperature for 15 to 20 minutes. This dries the coating and helps it adhere during frying.
- Heat the Shortening: While the chicken rests, melt the vegetable shortening in a 12-inch cast-iron skillet over medium heat until it reaches 325°F. The fat should be about 1/3 inch deep.
- Fry the Chicken: Carefully place the chicken skin-side down in the hot fat. Don’t crowd the pan; fry in batches if needed (breasts usually take longer than legs). Fry for 10 to 12 minutes per side, maintaining the oil temp between 300°F and 325°F.
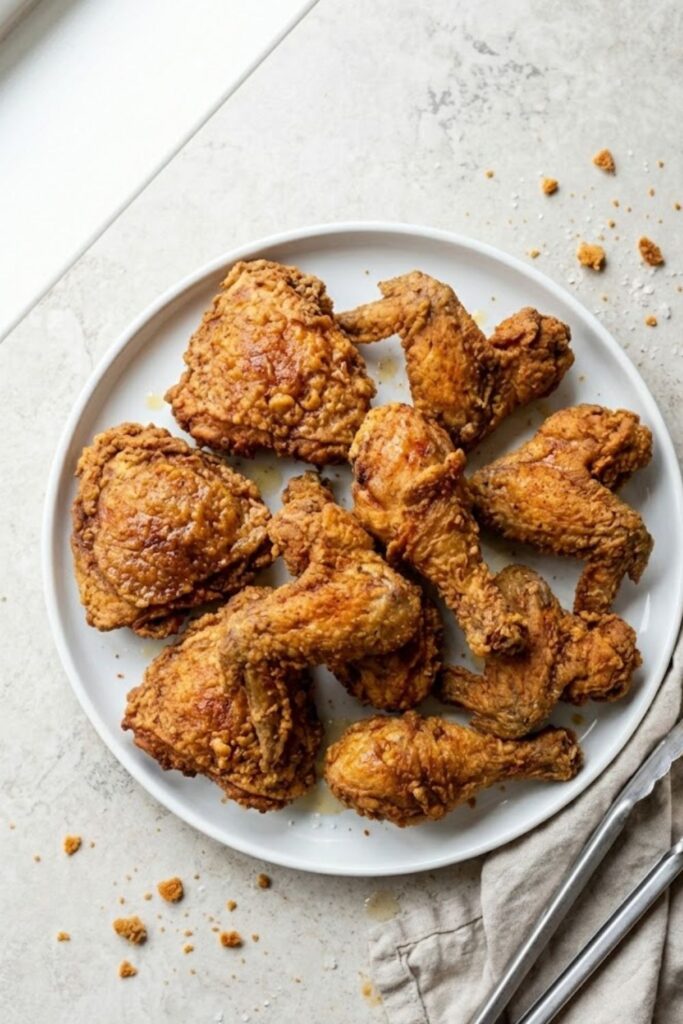
- Drain and Serve: Remove the chicken when it is a deep golden brown and reaches an internal temperature of 165°F. Drain on a clean wire rack (not paper towels) to keep the bottom crispy.
Recipe Tips
- Monitor the Heat: Use a clip-on candy thermometer or an instant-read thermometer to check the oil. If it drops below 300°F, the chicken will be greasy; above 350°F, the crust will burn before the inside is cooked.
- Don’t Use Paper Towels: Draining fried chicken on paper towels steams the bottom of the crust, making it soggy. Always use a wire cooling rack.
- Room Temp Chicken: Letting the chicken sit out while the coating sets also brings the meat closer to room temperature, which prevents the oil temperature from plummeting when you add the pieces.
- Shortening vs. Oil: Vegetable shortening is traditional for this recipe and creates a crisper, less greasy crust than vegetable oil, but peanut oil is a great alternative.
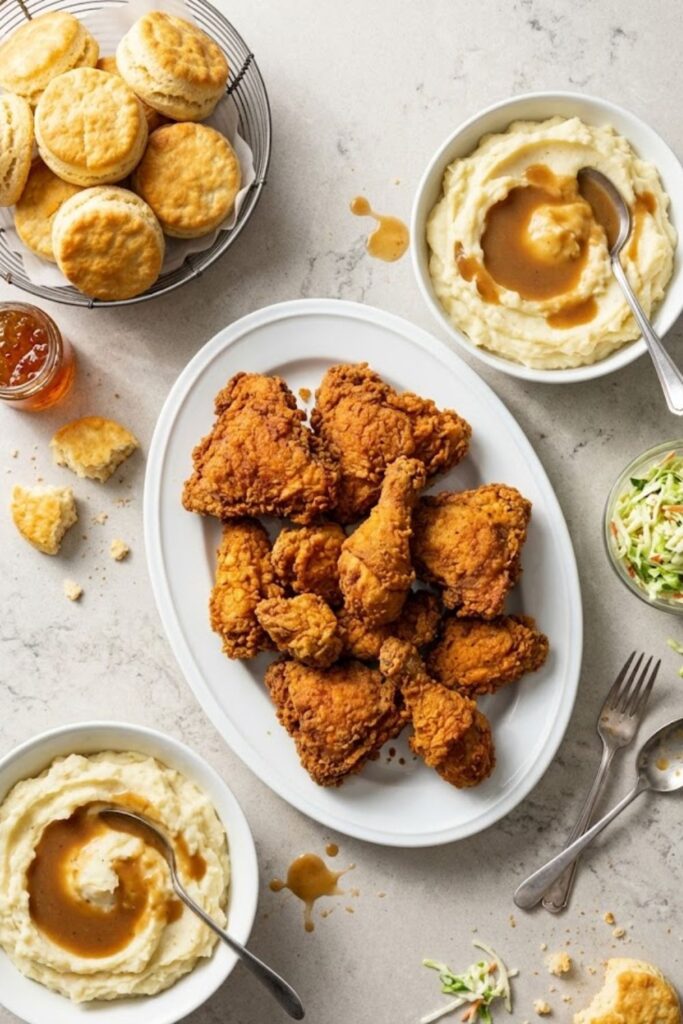
What To Serve With Fried Chicken
You can’t go wrong with creamy mashed potatoes and a rich gravy to balance the crunch of the chicken. Coleslaw is another essential side, providing a bright, acidic crunch that cuts through the richness of the fried coating. For a true Southern spread, add warm buttermilk biscuits with honey or pepper jelly.
How To Store
Leftover fried chicken can be stored in the refrigerator for up to 3 days. To reheat, place the chicken on a wire rack in a 350°F oven for 15-20 minutes until the skin crisps up again. Never microwave leftover fried chicken unless you want a soggy, rubbery mess.
FAQs
- Can I use boneless chicken? Yes, but the cooking time will be much faster. Check boneless thighs or breasts after 6-8 minutes per side to ensure they don’t dry out.
- Why is my breading falling off? This usually happens because the chicken wasn’t dried enough before dredging or didn’t rest long enough after dredging. That 20-minute rest on the rack is crucial for the glue to set.
- Can I reuse the frying shortening? Yes, you can strain the cooled shortening through cheesecloth to remove crumbs and reuse it once or twice, provided it didn’t burn during cooking.
- Do I really need 24 hours for the marinade? You can get away with 4 hours, but the enzyme action of the buttermilk works best overnight to break down the protein structures for maximum tenderness.
- What if I don’t have buttermilk? You can make a substitute by adding 1 tablespoon of white vinegar or lemon juice to a cup of regular milk and letting it sit for 5 minutes.
Nutrition
- Calories: 520 kcal
- Total Fat: 28g
- Saturated Fat: 7g
- Cholesterol: 115mg
- Sodium: 980mg
- Total Carbohydrate: 22g
- Protein: 42g
Try More Recipes:
Alton Brown Fried Chicken Recipe
Description
A scientifically structured fried chicken that uses a long-duration buttermilk brine to break down proteins for maximum tenderness and a specific resting phase to ensure the crust stays locked to the meat.
Ingredients
Instructions
- Brine the chicken pieces in buttermilk for 12 to 24 hours in the refrigerator; the lactic acid in the milk is essential for tenderizing the muscle fibers before they hit the heat.
- Drain the chicken thoroughly in a colander and prepare a spice blend using the salt, paprika, garlic powder, and cayenne pepper.
- Season the damp chicken pieces liberally with the spice mixture, ensuring every crevice is covered to create a flavorful barrier between the meat and the crust.
- Dredge each piece in the flour, shaking off any excess vigorously to avoid a heavy, doughy exterior.
- Rest the flour-coated chicken on a wire rack for at least 20 minutes; this allows the moisture from the chicken to hydrate the flour, creating a “glue” that prevents the skin from detaching during frying.
- Heat the vegetable shortening in a 12-inch cast-iron skillet to 325°F, maintaining a depth of about 1/3 inch for optimal heat transfer.
- Fry the chicken skin-side down for 10 to 12 minutes per side, monitoring the temperature to stay between 300°F and 325°F until the internal temperature reaches 165°F.
- Drain the finished pieces on a wire rack to allow air circulation, preventing steam from softening the bottom of the crust.
Notes
- The 24-hour buttermilk soak is a critical biochemical step where the mild acidity of the buttermilk breaks down the connective tissues and seasoned salt penetrates deep into the meat, ensuring the chicken is seasoned to the bone.
- Resting the chicken on a rack after dredging allows the flour to form a cohesive, hydrated matrix with the buttermilk and chicken juices, which prevents the coating from “shattering” or falling off in large sheets when bitten into.
- Utilizing solid vegetable shortening instead of liquid oil provides a cleaner flavor profile and a higher smoke point, while the shallow skillet depth ensures the chicken is cooked through radiant heat from the pan and conductive heat from the fat simultaneously.